Somewhere in the multiverse is an Earth where every property gets the toy line it deserves. While we (regrettably) don’t live in that universe, we do live in a Golden Age of geekdom—one where the idea of creating your own toys is absolutely viable with the proper set of circumstances.
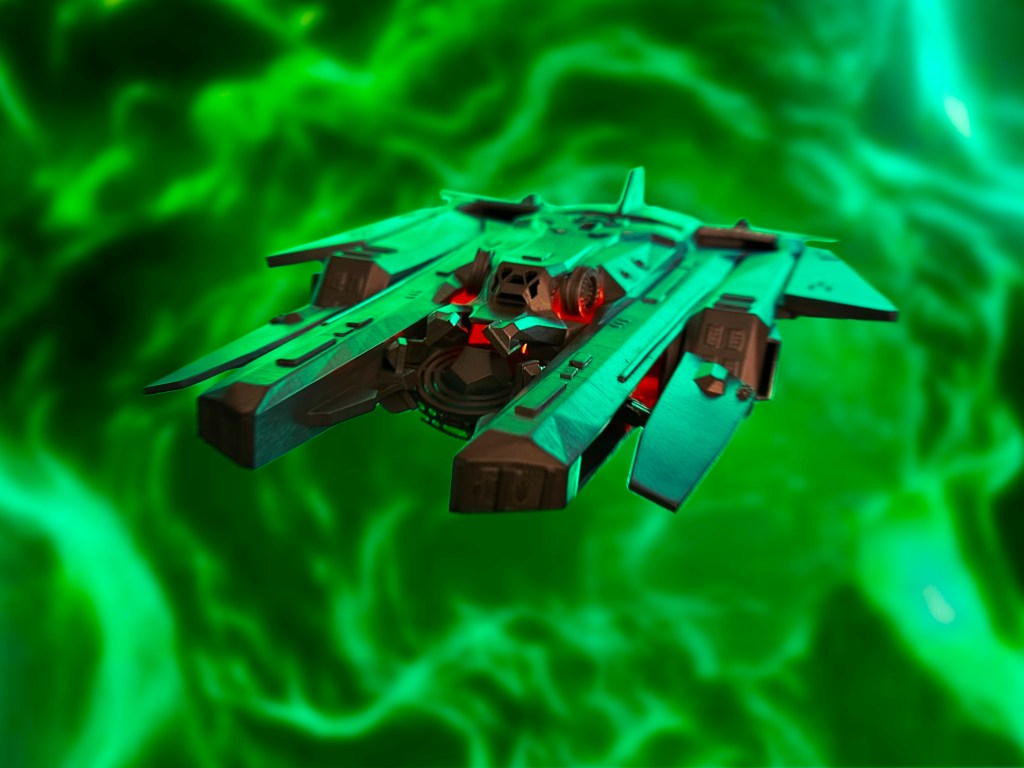
I’ve always loved the design of the Waverider timeship from DC’s Legends of Tomorrow but didn’t feel my typical urge to own a model of it until the show’s fifth season. Well, the season five trailer, to be exact. That was the first time I saw the otherwise CG Waverider represented in the flesh (read: plastic) in a clip from a soon-to-be favorite episode, “The One Where We’re Trapped On TV.”

The purposefully low-rent, Star Trek send-up version of the ship instantly pulled an Inception on my brain and planted a desire to make my own Waverider. I wanted the toy that never was, with lights and poseable pieces that could sit comfortably on my shelf next to the Kenner Milliemium Falcon of my childhood.

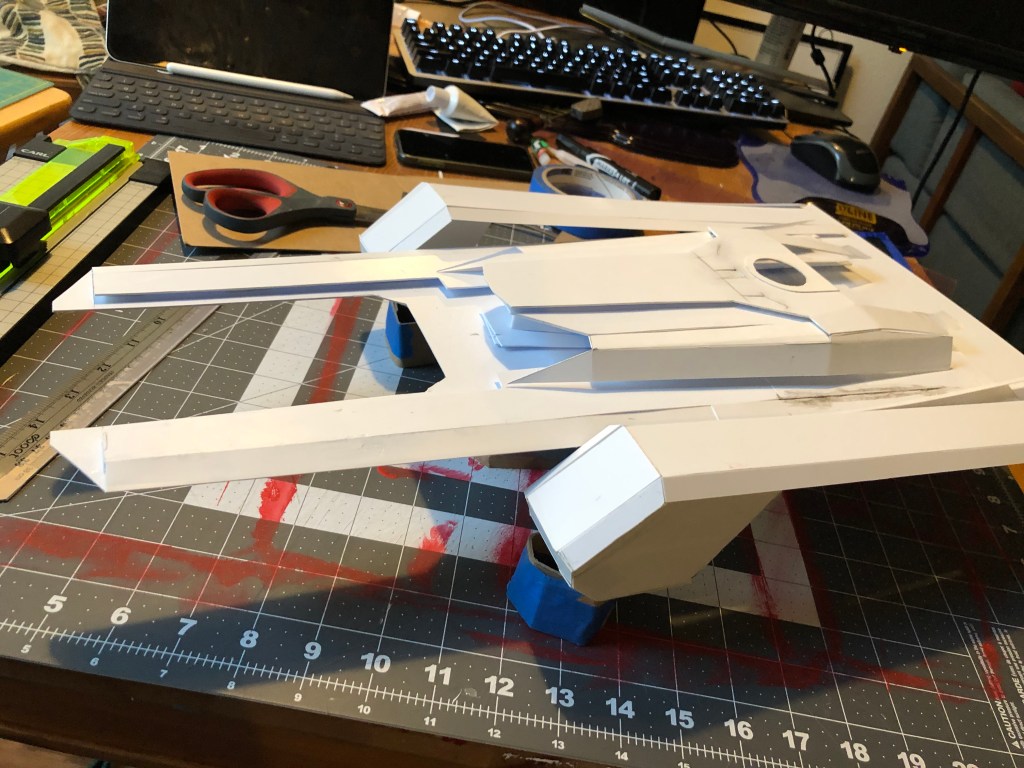
Initially, I thought I would build the whole ship from scratch in Styrene, but after a few failed attempts and many wasted hours, I pivoted to the much “easier” and only slightly more expensive 3D printing method.
STEP 1: 3D MODEL

Though I had already proven that I didn’t have the modeling skills to make the ship entirely by hand, I didn’t want something that came fully formed out of the printer. Essentially, I wanted a custom model kit of pieces I could assemble and customize as needed, with room to add functionality and lighting.
Thankfully, 3D designer Paul Spooner was up to the task. Armed with nothing but screencaps and a few line drawings (not to mention a lot of patience while dealing with my far-too-particular notes), Paul came up with a beautiful version of the ship’s body and attachments.
STEP 2: PRINTING
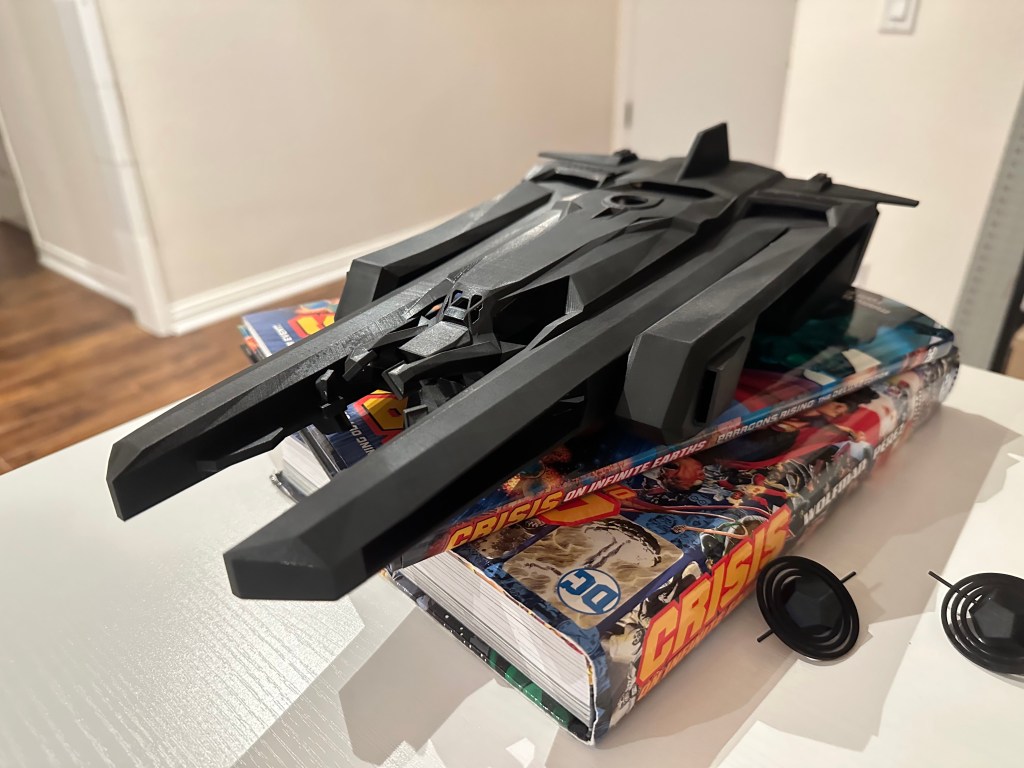
I used a company called CloudCraft3D to print my model pieces in standard resin at 110% the size of Paul’s original files. This brought the ship’s body out to roughly 14″ long.
To CloudCraft’s credit, the pieces were beautifully printed and arrived quickly (about two weeks after ordering).
STEP 3: SANDING AND MORE SANDING (RINSE AND REPEAT)
The print quality of the pieces was pretty damn great, but all 3D prints need some care before the real fun begins.
I did a few rounds of sanding and cleaning with progressively high grits. I also filled some obvious holes and weak points with sculpting putty.
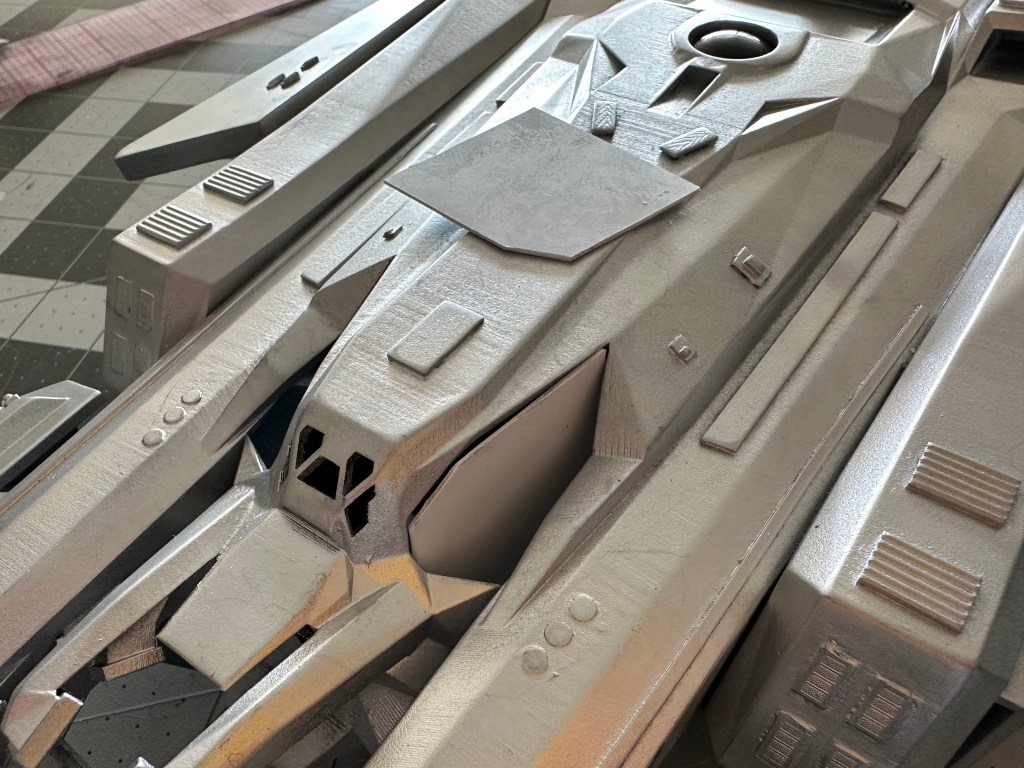
STEP 4: KIT-BASHING

From the jump, I didn’t want my Waverider to be overly detailed. The CG ship is replete with the panels and trimmings necessary to sell scale on screen, but all of that can become a distracting cacophony in miniature – not to mention a hell of a lot of work!
So, in the spirit of Kenner-izing my version, I identified a few key panels and greeblies (small details on models that give scale) throughout the ship that I wanted to ensure were represented.
Before we go on, if the concept of kit-bashing is completely foreign to you, check out this video from Adam Savage about model-making and detailing that goes through all the basics. Amazing stuff from a nerd God.
As my main greeblie donor, I was lucky enough to get a hold of an Anzio Annie model kit (re: Adam Savage video above, this is the ILM team’s favorite model and a treasure trove of great parts). I also used pieces from a metal model kit of the Kepler spacecraft by Fascinations (this was immeasurably helpful for making the intake vents) and a few hand-cut Styrene panels. Plus, my favorite idea during this whole project, I used segments from an original Kenner Millenium Falcon to line the cavity behind the forward wings: Time-saving AND easter egg-y.


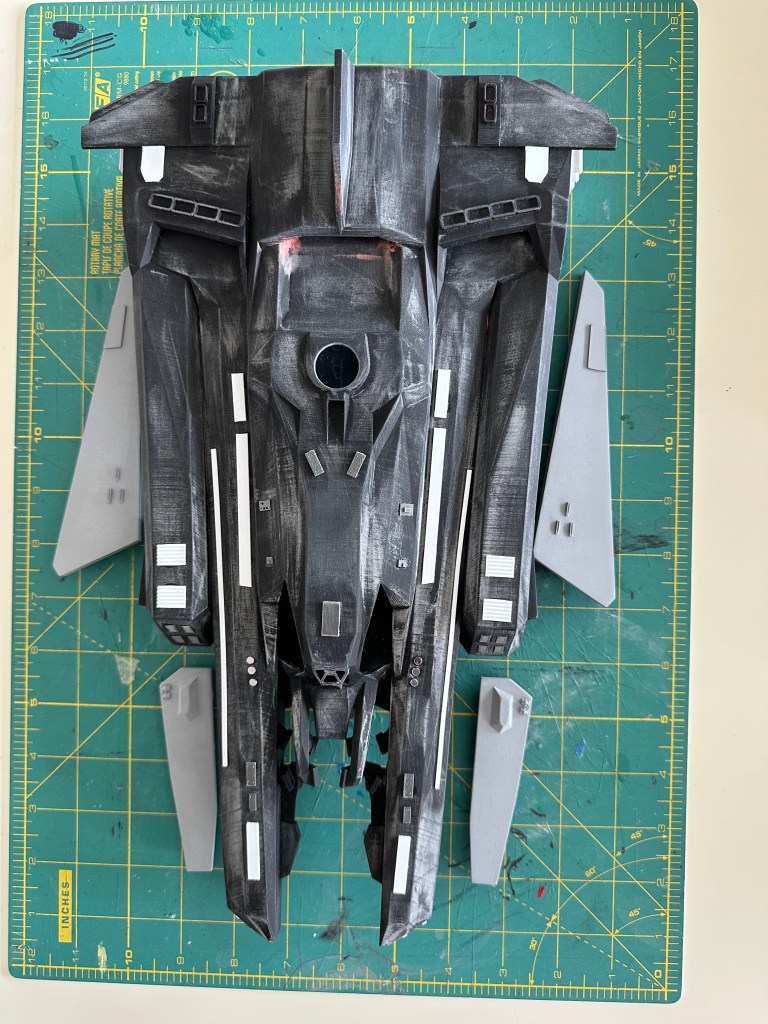

I would have happily done this for days but completed the task in about eight hours. Easily my favorite day of crafting/thing-making in recent history. Plus, it came out looking great! The trickiest bits by far were the arrows on the aft wings and the line of three circles on either side of the bridge window. I also managed to sneak in two “universal greeblies” on the bottom of the ship.
I sat with the thing overnight and primed it the next morning when I was sure I was done detailing.
STEP 5: PRIME TIME/SANDING STRIKES BACK


I did about five or six rounds of sanding, filling, and priming, using fillable spray primer, sculpting putty, and various grits of sandpaper. A more patient model maker could probably have gone another five or six rounds, but at that point, the ship was in fine shape, and I was so tired of seeing that matte grey paint.
STEP 6: ATTACHING THE WINGS
I knew I wanted the ship’s four wings to be poseable, which meant I had to figure out a reliable, miniature hinge that would look at least somewhat inconspicuous under the wings. This was the biggest problem to solve throughout the whole project, which only made the solution feel that much more obvious when I found it: Lego.

After consulting with a Lego builder friend, I went with a few pairs of hinge plate locking fingers (Lego parts 44301 and 44302). After a little epoxy and some placement trial and error, they wound up working like a charm.
STEP 7: PAINTING
This was an ongoing step, really, but it started around here, and posed an embarrassingly specific aesthetic question.
Throughout the series, the Waverider had two distinct finishes. The ship in seasons 1-3 has an “original trilogy” aesthetic, with different shades of panels and pieces throughout to break it up visually. Then, season 4 introduced the all-chrome version (prequel aesthetic?) that sticks around for the remainder of the show.
I like both, but I chose the Chrome version because it made the ship feel a little more tactile, oddly. Plus, it’s what the ship looked like for the majority of the series.
Regardless, if you’re following along in hopes of making your own, just assume I’m painting and repainting throughout the rest of this. I experimented with metallic blue and black under paint for depth, but it honestly didn’t add much to the piece.
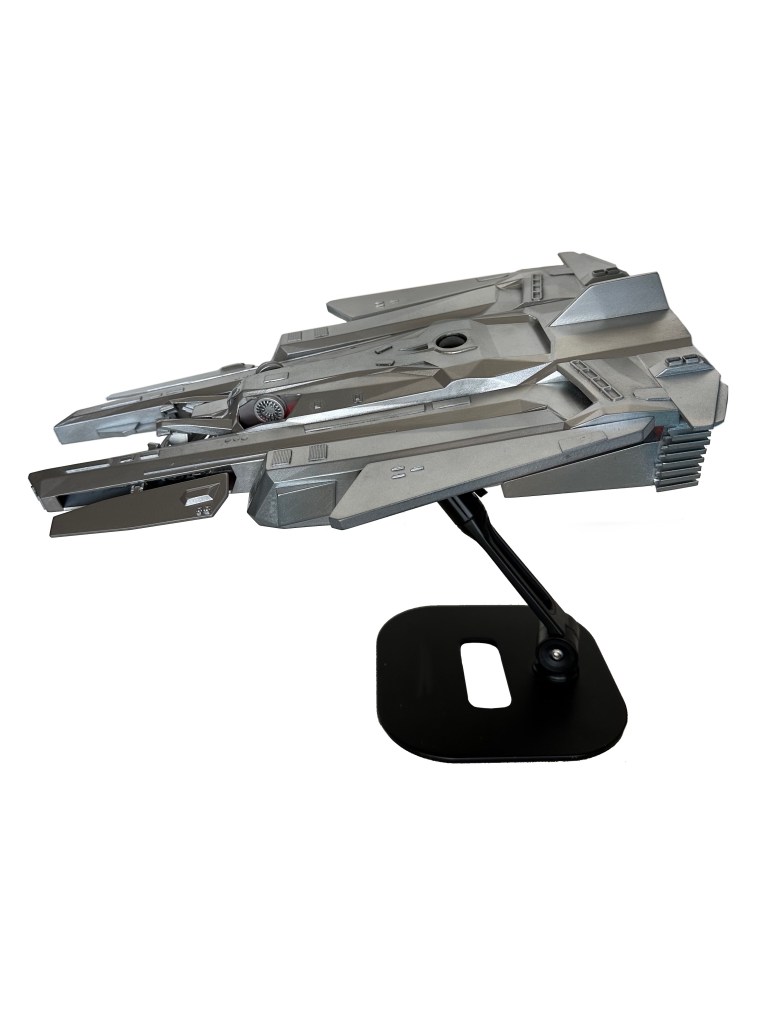
STEP 8: MOUNTING
This was stupidly simple. First, I bought a magnetic iPad stand on Amazon, chosen for its color and its unique mounting head.
Then… wait for it… I epoxied a mason jar lid and a few magnets to the inside hull.
A little janky, but it whatever. You wouldn’t know it was there if I hadn’t just told you about it.
STEP 9: SOME ASSEMBLY REQUIRED
With pieces painted and the wings in place, I finally felt confident enough to assemble the other components. I gingerly drilled holes near the front of the ship to hold the dowels of the the time core, and even more gingerly installed the piece in place (pro hint: print two time cores. I broke one weeks before on kit-bashing day).

This is also the stage where I added a cage piece to the hull (per screencaps), and the final panel pieces to the sides of the cockpit.
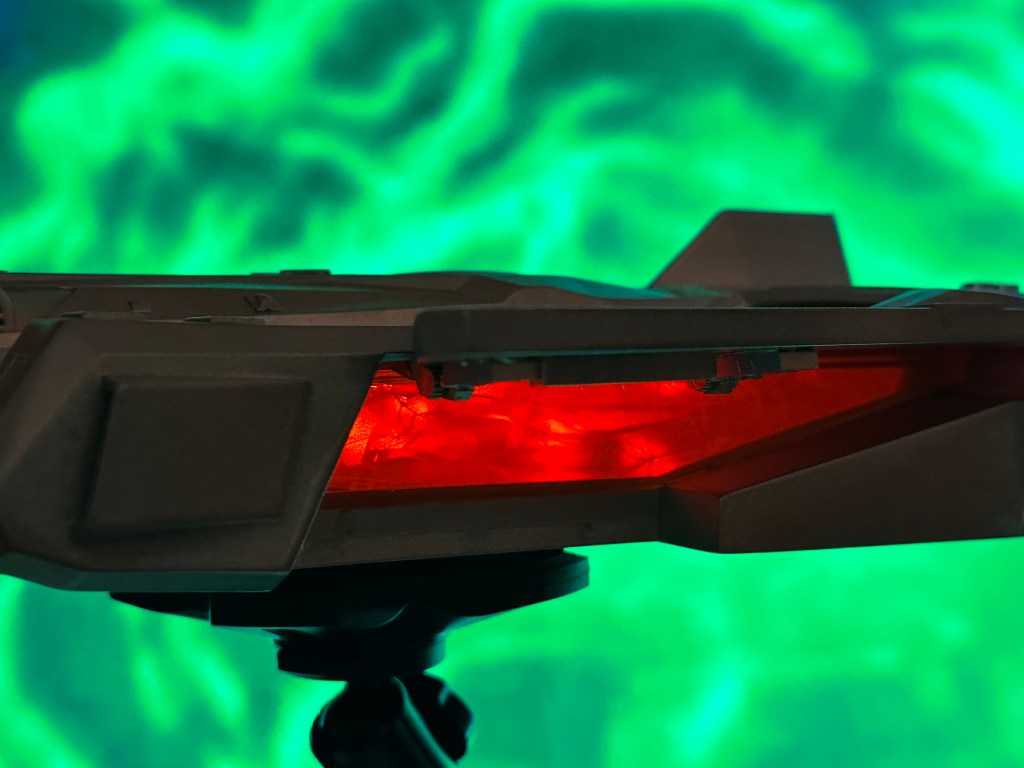
STEP 10: LIGHTS
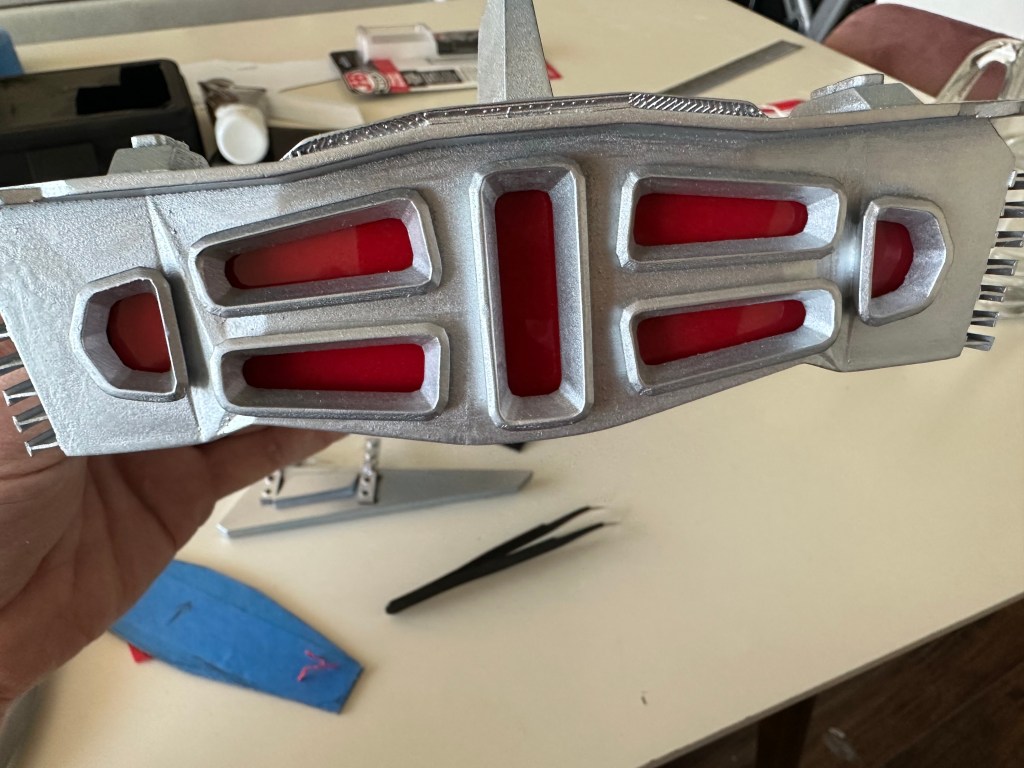

I’m not the least bit electrically savvy, so I decided to take the easy route and use battery-powered, orange fairy lights. I painted the pack silver, attached to the outer hull, and wrapped the lights throughout the body. I glued a few lights in place, filled the body with bits of crumbled-up smoked plastic, and covered the side cavities and thrusters with transparent orange and red plastic pieces taken from some sacrificial storage bins. I also added a fine metal mesh between the plastic and the thrusters, which gave a pretty cool “grill” effect.
And, with that, my Waverider was complete!


Well… for now. Turns out the hardest part of this whole thing is finding a place that will print custom model decals in white. I really want to put the ship’s number tags on the wings, but that detail will have to wait for now.
All good, though. I’ve got plenty of time.
Up for some more Legends of Tomorrow madness? Look for Always Hold On To DC’s Legends Of Tomorrow wherever you get your podcast! Or HERE. You can just click HERE.


Leave a comment